

You've tried every other artistic medium in the book, but when it comes to oil paint, it just seems so daunting, right?
You're not alone. Many customers who shop at Wallack's share that they often feel intimidated by oil paint.
Most artists have a fear of exploring oil painting because there just seems like there is too much to know before getting started. What mediums do you use? Is it safe? How long does it really take to dry?
Wallack's has Ottawa's most diverse selection of oil paint, with SEVEN brands of traditional oil colours and a wide selection of different oil paint mediums.
We're here to break it down with all the quick facts and best practices, so you can conquer oil painting and feel confident doing it.
What is Oil Paint?
Oil paint at its basic level is an emulsified combination of drying oil and pigment. It has been used for hundreds of years and is known for its incredible buttery consistency, vibrant colours and glossy wet-like appearance. If you've been to an art museum, most paintings created before the mid-twentieth century use oil paint.
Why is that?
Oil paint gives you the flexibility to start a painting, then come back to it the next day and continue straight where you left off and the colours on your canvas can still be blended together.
So, when artists of that time would spend months (and sometimes years) working on a painting, they would appreciate the ability to revisit a wet canvas to continue working on it's details.

Mediums
You can paint with oil directly from the tube, but there are also several mediums that can change the experience of working with oil paint. Mediums can change the texture, drying time, finish and consistency of the paint vastly.
Read about the various mediums to use with oil paints below:
Drying Oils
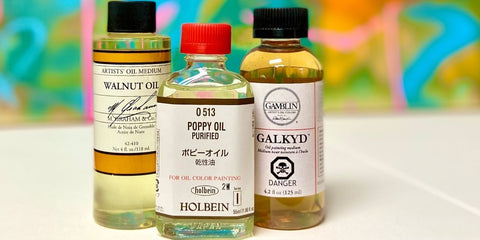
Linseed Oil
Linseed oil is the most commonly used medium when it comes to oil paint. It is created by compressing flax seeds and extracting the oils they release. Linseed oil reduces consistency and improves paint flow. It will also increase gloss and transparency.
This type of oil will slow the drying time of your painting, which allows you to continue to work on your piece for longer. It is an excellent oil to use for a glazing technique, where you add several thin layers of oil over top of one another, and slowly build up the image.
Linseed oil is also the traditional form of binder in oil paints. Meaning, when oil paint is created, linseed oil is thoroughly blended with different pigments into a smooth consistency until the pigment is “suspended” within the oil.
When using this type of oil, be mindful of how much you’re adding to your paint. Adding too much linseed oil can cause yellowing, especially to lighter toned paint colours, like titanium white.
Linseed oil is quite thin, similar to the consistency of cooking oil. As mentioned before, it will thin out your oil paint. If you're looking to maintain some of the density of your oil paint, you may be interested in trying stand oil. Stand Oil is a variation of Linseed oil which is a thicker version. It dries to a tough, smooth and elastic finish, and it levels out, leaving no brush marks.

Poppy Seed Oil
Are you looking for a slower-drying alternative to linseed oil? Poppy oil may be your answer! This pale oil is made from poppy seeds which dries slowly and is perfect for pale colours because it resists yellowing when drying.
Poppy oil will still increase the gloss and transparency of your paint.
This oil is deemed a semi-drying oil, and so use it in moderation while painting, because when adding too much, it will take ages to fully cure.
This oil is perfect for a “wet-on-wet” technique (or alla prima), where you apply multiple layers of wet oil paint on top of one another, before allowing the previous layer to fully dry.
Poppy oil is also amazing for increasing the blendability of your paint
Walnut Oil
Walnut oil can be in use as both a binder for oil paints, and as a painting medium. It yellows less, and is less prone to cracking than linseed oil. It will also produce less of a streak compared to linseed oil.
You’ll need to be careful when storing any nut-based oils as they can quickly expire if they have not been sealed up properly, leaving a rotted smell. To avoid this, keep them well-sealed and in a cool, dark place.
Solvent
Solvents serve multiple purposes in the process of oil painting. They can be used to thin the consistency of the paint, to wipe off layers of wet paint or correct mistakes, they can thin varnishes, and they can also be used to clean your brushes and palette.
Solvents are toxic, so they must be used in a well ventilated area to prevent nausea and headaches. It’s also best to use gloves when using solvent to prevent skin contact.
White Spirits
The most common form of white spirit in North America is Odourless Mineral Spirits. Odourless Mineral Sprits are a petroleum-based product and can take on many names from the various brands that produce it, but in a material sense, the products are all very similar.
Essentially, odourless mineral spirits are simply mineral spirits that have been further refined to remove the toxic compounds that cause a smell, so that artists can work closely with the product. You can often find odourless thinners at DIY or hardware stores, but make no mistake- these have many more impurities that have not been filtered, and so they do not make an ideal thinner for artists.
Scented Solvent
In the case of scented solvents, some companies will add in citrus oil to their solvents as a natural (and less environmentally impactful) way to dissolve paint, wax and varnishes.
Other
Alkyds
Alkyd mediums were created for oil painters who were looking for a quick-drying alternative to regular oil paint. Alkyds are special painting mediums that are made from an oil-modified resin treated with alcohol and acid, hence the fusion of both words to create a new word, ‘alkyd’. The result is a honey-colored substance that dries quickly to a hard enamel. All alkyd mediums dry much faster than the ‘drying oils’ used with oil paint, enabling the artist to apply a second coat of paint on the following day.
Alkyds are designed for glazing techniques as the medium adds translucency and accelerates drying of oil paints. The drying rate of tradition oils can be speeded up to fifty percent, although factors such as the thickness of the paint and environmental factors will come into play.
One major problem of painting with oil paints is that they take a lengthy time to dry. Adding any additional oil to your paints will not make a significant difference in the speed in which they will dry, and so as another alternative is to use gels as a replacement for oil mediums
Waxes
Cold wax medium is a mixture of beeswax, solvents and alkyds and can be mixed directly with dry pigments, or can be mixed in right with your oil paint to create a fluffy and creamy texture that is similar to icing.
To mix, use a palette knife and press the wax into your paint until smoothly combined. The texture will take on a unique stiffness that will be able to hold stiff peaks. Just like other mediums, adding wax to your paint will increase the translucency and add a lightness to your colours.
To prevent cracking the wax, it’s best to apply paint mixed with this medium onto stiff surfaces like panels or boards. Waxes are best applied with a palette knife instead of a brush because they can easily clog up the bristles of a brush.

Techniques, Tips & Tricks
Mixing
You can make oil paint more fluid by mixing it with more oil, or by adding a solvent, however, this also dilutes the paint.
There is a lot of variation of how much of a medium you can use to mix in with oil paints, and a lot of this can be discovered simply by experimentation. As an example, you can use solvents and oil mediums to mix in with your paint, or, you can use your oil paint in small amounts to tint your solvents and oils.
To avoid wasting extra paint, it is best to use a palette knife to mix your paints in with mediums. This will keep the majority of paints on the palette, instead of in the brush fibers.
Fat over Lean
The “fat over lean” rule allows you to build a painting that is flexible so over time there will be less cracking to your painting.
In short, the base layers of your painting should be "leaner" than the upper layers. This means that you should mix more solvent (the lean medium) into your oil paint in the first layers of your painting, and then proceed to add in more oil medium (fat medium) as your painting progresses. The top layers will have more fat than any previous layer.
This can also apply to using acrylic paint (which is lean) as an underpainting before applying any oil paint on top. Some artists will do this as a way of quickly blocking in major shapes and colours because acrylic dries fast and is inexpensive compared to oil paint.
Keeping & Storing Oils
You can pre-mix your oil paints and easily keep them fresh for days/weeks by storing them in a palette with a lid, or by simply putting a layer of plastic wrap on top of them.
Many artists will lay out their palette by colour and continue to use the same paints for many future works. Because oil paint is so pigmented, you’re able to only use a small amount to achieve saturated colour on your surface.

Drying Time
It's true. Oil paint can take a really long time to dry.
Traditional oil paints dry by oxidization, when the oil reacts with oxygen in the air. There isn’t any water in the paint to evaporate, so therefore it never dries, but rather it oxidizes or cures.
Generally, oil colours become cured in thin layers within two to 12 days but can take up to six months to two years to fully cure thicker paint. How the pigment reacts with the oil medium will determine how long the paint will take to cure and therefore, every paint will have it's individual curing time.
Curing time is important to note specifically when you're varnishing a work. You should allow for at least 3 months of curing time before applying a varnish layer.
Health and Safety
As previously mentioned, there are several best practices to follow when working with oil paints to keep yourself and your household safe.
- Wear a mask while working
- Wear gloves or protective barrier cream on your hands
- Work in a well ventilated space (either an open window or have designated ventilation)
- Store all liquids in air-tight containers, and keep them in a cool, dark space away from animals or children
- Any product that comes in contact with your eyes or skin should be thoroughly cleaned and flushed out. Refer to bottle for further directions.
- Oily rags need to be disposed of properly, as they can spontaneously combust if they are exposed to heat or light
- Keep drinkable liquids (like coffee or tea) away from your work space so to avoid accidentally drinking the wrong thing

Clean Up
To a beginner, cleaning up for oil paints can seem daunting, but really it's a simple process if you have the right tools and materials.
Something to note before proceeding, oil paint can (and will) clog your drain, but if you follow these tips, you’ll avoid that problem altogether.
Steps:
- Remove the majority of paint from your brush / palette knife by using a rag or by scooping off excess paint back onto your palette for future use.
- Seal up your palette with plastic wrap or a lid so that you don’t unnecessary waste paint
- If you’re done using your palette altogether, use a rag with some solvent to wipe away any paint remains.
- For dried up paint, use a sharp edge scraping tool to remove the cured paint
- Take your brushes and dunk the bristles into your jar of solvents, and swirl it around. This will dissolve the majority of oils and pigments that are still stuck in the heel of the bristle.
- TIP: if you leave your jar of used solvents to settle, you can pour off the clear solvents into a new jar to reuse, and then discard of all the old paint remnants
- After the solvents, dab your brush onto a rag to remove excess solvent and take it to the sink. Coat the bristles with brush cleaning / conditioner and use the palm of your hand to work the soap thoroughly through the bristles.
- As a cheaper alternative, you can use dish soap to clean your brushes, but unfortunately dish soap does not have the same conditioning benefit as brush cleaner does.
- Rinse and repeat until the soap no longer gets tinted to the colour of the old paint. You’ll be surprised how much paint remains in those bristles.
- Lastly, reform the bristles on your brush and store them upright (bristles upward) in a container to dry
Who is oil best suited for?
You’ll love oil painting if you are someone who loves to blend your paint or enjoy working in a hyper-realistic manner. You’ll love it if you are always looking for more intense colour when working with an alternative paint. You’ll love it if you like to take your time and really enjoy the process of painting.

Brands we carry
Student-Grade brands:
Artist-Grade brands:
Winsor & Newton Artist Colours
Differences in Qualities
Quality of paint is usually broken down into two major categories: Student-grade paint and professional-grade paint.
The quality of oil paint varies based on the quality of the pigment used, how fine the pigment is, how much pigment is in the paint, and the medium which is used to combine the pigments. Having more pigment in the paint means that the color covers more surface when used with mediums and is available in more colors than student grade. With cheaper paints, there will be more fillers used as a substitute for pigments or other mediums.
Typically in a student-grade paint, in one tube there will be several different cheaper pigments combined to create a colour to give the impression of a single-pigment paint. These colours are referred to as “hues”. As an example, a Cadmium Red Medium Hue could have PR 112 & PR 5 pigments, whereas Professional grade Cadmium Red Medium will have only the PR 108 pigment.
Student grade oil colors have their advantages. Some artists prefer using them as the underpainting and then finishing up the detailed work with artist-grade oils. Because they are more economical, they can be used for experimenting with and covering larger canvas areas.
Of course, with a difference in quality comes a difference in price. Student grade paints will typically have one or two different price points and professional paints can range between 5-6 price points, depending on the pigments used.
Ideal brushes
Oil paint works best with a brush that has natural bristles because of your use with solvents. Solvents can easily deteriorate synthetic bristles, and so if you’re concerned about the longevity of your tools, opt for a natural bristle like hog hair.
If you decide you'd still like a synthetic bristle brush, make sure that it's rated to support solvent and oil paint. One of Wallack's best selling oil paint brushes is actually a synthetic brush. You can find the Princeton Catalyst brush HERE
Because oil paint is so stiff, you’ll also need a stiff bristle. This type of brush will help to guide the paint along your surface with much more ease. Due to the thickness of this type of bristle, it will allow the paint to be released and spread evenly.
Check out our entire collection of Oil Brushes HERE

Other supplies needed for painting with oil paint
Canvas / Panels / Boards
For oil painting, you can choose between a canvas or a wooden board as your surface, but there are some things you may want to consider before making your final choice. If you’re planning to make a thicker style of painting, opt for the panel / board because it will give you adequate support and will avoid flexing and cracking the paint.
For thinner layers of paint, you can choose to use either support.

Palette
There are several different palette options that you can choose from for oil painting. Through experimentation you’ll be able to find what works best for your style of painting.
Traditionally, the most popular palette was to use a prepared wooden palette (you can imagine Bob Ross’ oval shaped palette with a thumb hole). Wooden palettes have to be oiled beforehand to avoid paint seeping into the surface of the palette. To do this, take an old rag and some linseed oil, and massage the oil into the surface until it’s completely absorbed.
A more modern style of palette choice would be to use a smooth, flat, thick piece of glass. Glass palettes make for a more ideal surface to mix paint on because they don’t absorb any paint, they can be scraped clean. Be aware of sharp edges! Most artists who use a glass palette will tape their edges. A potential downside of using glass is it’s transparency can make it hard to tell which colours are being mixed on the surface, but to avoid this, simply put a piece of toned paper under the glass on your table top.
Additionally, some artists will choose to use a metal palette that most deem a “Butcher Tray”. This is a palette that is enamelled metal. The enamelled surface is extremely durable, easy to mix on and provides a flat even-coloured surface to see your paint for what the colours truly are. This style of palette is very popular.
You may like to use a paper palette as a means to mix colours. Paper palettes are great because they provide you with a prepared surface that is ready to go, and when you’re done with your project, you simply rip off the page and discard it. This option is perhaps the least environmentally friendly as it produces quite a bit of waste, but it does provide you with a quick solution if you’re in a rush. The paper palette has a waxy surface that is similar to wax paper, and it does not hold up to long-term exposure to varnishes and solvents. It also prevents you from having the option of saving any of your paint for future projects.
Lastly, although not the most ideal choice, you can use a plastic palette. Be sure to check that the plastic is rated for the use with solvents, otherwise the solvent can start to eat away at the surface of the palette.
Easels
An easel is an incredibly useful tool in the process of painting.
Having an easel allows you to work standing or sitting, and will prop up your surface so that you can view it from near or far. An easel will also allow your surface to be clamped in by the canvas holders, to keep it sturdy for when you’re doing larger, gestural works. Some easels will even allow you to organize your space better by providing areas to hold your brushes and paint. Though having an easel is not completely necessary in the process of making an oil painting, it provides a certain ease that makes the painting process a lot more enjoyable.
When choosing an easel, consider a few different things:
- Will you be standing or sitting (or both) in the creation of your work? Make sure your easel has the ability to adjust to different heights.
- Do you live in a small space and will need the easel to be stored away when you’re not using it? Make sure your easel can compact into a flat plain.
- Do you need to have space on the easel to store some materials?
- If so, make sure to account for the size of your paint tubes and other materials
- Will you be travelling with your easel? If so, choose one that is lightweight and can be folded up
- Will you be using your easel for other types of paint? If you’re planning to use it for watercolour painting as well, make sure it has the ability to tilt to a 90 degree angle
Rags
Rags can be used to wipe off excess paint from your brushes, palette and the surface of your painting.
Palette Knives
Palette knives can be used in conjunction with or as an alternative to paint brushes. They come in a variety of edge shapes and sizes, and are a fun way to add texture and build up interesting surfaces on your painting.
Palette knives are also an ideal tool when mixing paint. They can be flexed and used to scrape the surface of your palette, which is great when combining stiff oil paint colours.
Containers
You’ll need a few different containers when oil painting. Old glass mason jars with lids are great for containing the different solvents and oils you may use.
Summary
So, it's clear that there is a lot to know about oil painting (some of which we didn't even cover in this blog post!) As much as you can read about oil paint, the very best way to learn is to grab a couple of paints tubes and mediums for yourself, and get to experimenting!
You'll be so thrilled with the variety of techniques, the vibrancy of colour and the silky application of oil paint that you just may never return to another form of painting.
We suggest you pop into our store in Ottawa and chat with one of the Wallack's staff to pick up some additional tips and tricks. You'll soon find out that every artist has their own experience of playing with the paint.